Air Gap Terraform

Are you planning to run terraform in an airgap environment? Join me as I talk about the issues you run into with this and how to solve them.
Traditionally, when you run Terraform to deploy infrastructure from your Infrastructure as Code (IAC), it needs a provider. In Terraform, the provider acts as a layer between the Terraform code you are writing and the object that is executing your desired actions. This could be a Proxmox Server API for deploying virtual machines or a cloud provider's API for creating resources in the cloud. To draw an analogy, think of placing a mobile order at Chipotle for a steak burrito. Just as the app is your interface to communicate your order to the burrito creator at Chipotle, the provider is the interface between you and the infrastructure creator.
In a traditional environment, when you specify a provider in your Terraform, such as "hashicorp/random," Terraform reaches out to the public HashiCorp registry for the provider. This provider is then downloaded and placed in the .terraform/providers directory within the Terraform directory you initialized to execute your Terraform.
In an airgapped environment with no internet access, there's no way to download providers from the internet and place them in our .terraform/providers directory. How do we fix this?
The answer is simple: we can create our own registry within our system to pull from. We do this by using what is called a .terraformrc or terraform.rc file. In this file, we can completely overwrite the registry location like registry.terraform.io and tell Terraform to look in a specific folder in our system for all our providers. Once created, when we initialize a Terraform directory, it will go to our internal registry specified in our .terraformrc file and download the provider into our Terraform Project directory so we can then use it to do our infrastructure magic.
In the below example, I have created an airgapped machine in Proxmox for this demo. To start, we need to install Terraform. Since we don't have internet access, I will first download the Terraform package on a device with internet access.
wget https://releases.hashicorp.com/terraform/1.7.0/terraform_1.7.0_linux_amd64.zip

As our airgapped machine lacks internet access, I will then copy this file to the machine from another device that can connect to it. Imagine I am putting the file on a USB and plugging it into a disconnected machine in this step.
The SCP command you can reference is listed below:
scp ./terraform_1.7.0_linux_amd64.zip ubuntu@1.1.1.1:/home/ubuntu

Once the file is transferred onto your new system using the command above or by other means, you now need to download Terraform and move it to your path.
To do this, execute the following:
unzip terraform_file.zip

sudo mv terraform /usr/local/bin/

terraform --version

Now that Terraform is installed, we can start preparing our library of Terraform providers on our system. To do that, we need to create the .terraformrc file specified above.
Create this file with the below content:
provider_installation {

    filesystem_mirror {
        path = "PATH ON SYSTEM TO PROVIDER LIBRARY"
        include = ["registry.terraform.io/*/*"]
    }

}
Because we are using Linux, the .terraformrc file will need to be stored in the home directory of the user.
After placing this file in the home directory of the user, we will need to create a location to store the providers and then update the .terraformrc file to show the correct path to that directory.
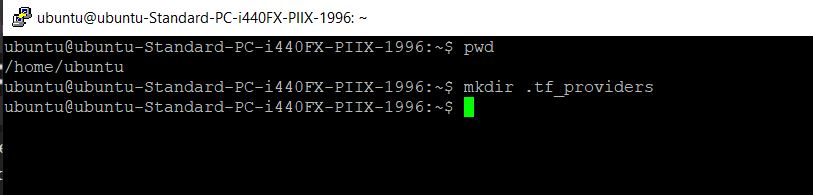
In my case, I will create a providers file named .tf_providers in my home directory, so I will need to update the path to /home/ubuntu/.tf_providers.
Now that we have created a .terraformrc file and our provider directory, we need to put some providers in it for our Terraform to use.
To do this, we need to go back to the machine that has internet. On this machine, in an empty directory, create a terraform.tf file with the text:
terraform{
  required_providers{
    random = {
      source = "hashicorp/random"
      version = "3.1.0"
    }
  }
}
Now run terraform init, and it will download our provider.

After Terraform has downloaded our providers and initialized our directory, our providers should be under .terraform/providers in the directory we executed our terraform init in.
Now that we have our random provider, we can move it to our airgapped machine. I will be doing this again using SCP, grabbing the registry.terraform.io directory under our .terraform/providers folder and moving it under the provider library folder on the airgapped machine we created earlier.
scp -r ./.terraform/providers/registry.terraform.io ubuntu@1.1.1.1:/home/ubuntu/.tf_providers

Now we should be able to see that our files have been transferred to our airgapped machine.

Now, to test that all this worked, I will create a test directory named "test" and create a main.tf file and terraform.tf file in it.
mkdir test
touch test/main.tf
touch test/terraform.tf
main.tf content
provider "random" {
  # Configuration options
}

resource "random_string" "random" {
  length           = 16
  special          = true
  override_special = "/@£$"
}


output "random_string" {
  value = random_string.random.result
}
terraform.tf content
terraform {
  required_providers {
    random = {
      source = "hashicorp/random"
      version = "3.1.0"
    }
  }
}
Now that we have everything we need in our directory, we can execute a terraform init. If everything works as expected, it will pull our random provider from our internal provider directory.
terraform init

We can now see that the terraform init was able to pull our provider from our provider directory. I will now apply the Terraform just to confirm it runs as expected. If it runs correctly, we will see an output for a random string generated by the hashicorp/random provider.
terraform apply -auto-approve
After the apply was run, we now see a random string and have executed a working Terraform apply without reaching out to the internet to pull in our provider.

Hope you enjoyed this blog, and I look forward to providing you interesting DevOps content in the future!